Tiling is both an art and a science, requiring precision, proper technique, and the right materials. Whether you're updating your kitchen backsplash, renovating a bathroom, or installing new flooring, understanding the fundamentals of tiling will help you achieve professional results that last for decades.
Understanding Tile Types and Materials
Choosing the right tile for your project is crucial for both aesthetics and longevity. Different materials suit different applications and environments.
Porcelain Tiles
The most popular choice for modern homes, porcelain offers exceptional durability and versatility:
- Density: Extremely hard and non-porous
- Water absorption: Less than 0.5% (perfect for wet areas)
- Durability: Highly resistant to scratches, stains, and wear
- Applications: Bathrooms, kitchens, high-traffic floors, outdoor spaces
- Best for: Heavy use areas, bathrooms, modern aesthetics
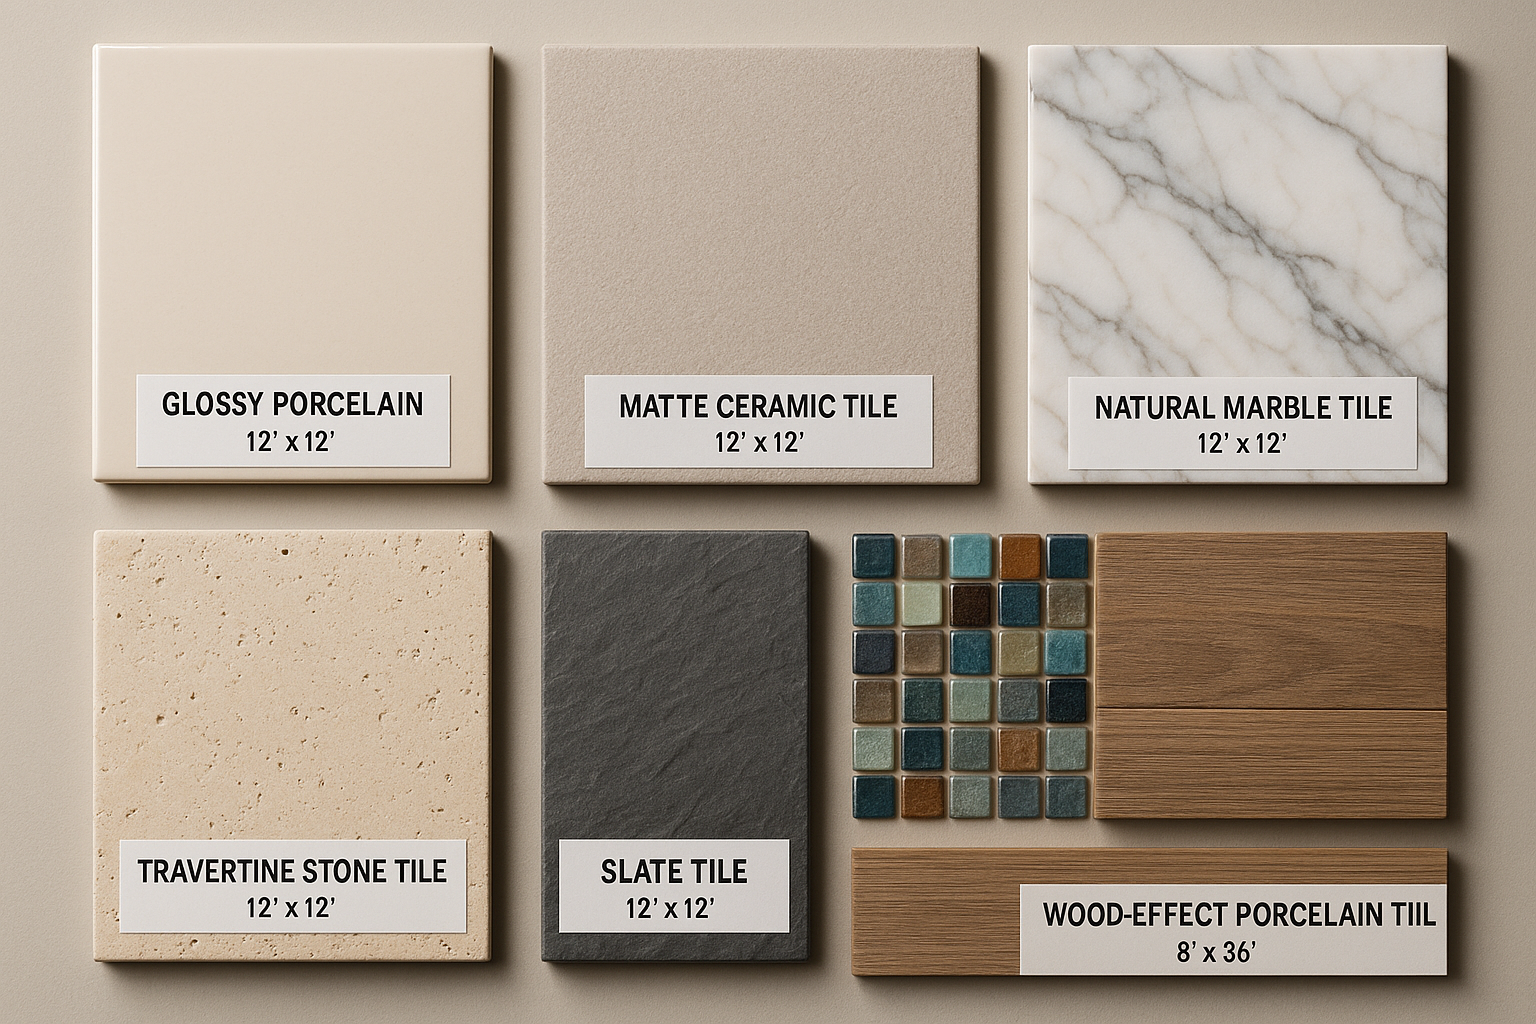
Ceramic Tiles
More affordable than porcelain, ceramic tiles work well for walls and lower-traffic floors:
- Composition: Clay-based, glazed finish
- Water absorption: Higher than porcelain (3-10%)
- Best applications: Kitchen walls, bathroom walls, light-traffic floors
- Advantages: More affordable, easier to cut, wide variety of designs
- Limitations: Less durable than porcelain, not frost-proof
Natural Stone Tiles
For a luxury finish, natural stone offers unique beauty but requires more maintenance:
Marble
- Luxurious appearance with natural veining
- Requires sealing to prevent staining
- Susceptible to etching from acidic substances
- Best for: Bathroom walls, feature areas, low-traffic floors
Travertine
- Warm, natural appearance with pitted surface
- Available in filled or unfilled finishes
- Needs regular sealing
- Best for: Bathrooms, traditional interiors
Slate
- Naturally slip-resistant
- Rustic, textured appearance
- Durable and low-maintenance when sealed
- Best for: Hallways, bathrooms, outdoor areas
Mosaic Tiles
Small tiles (typically under 50mm) mounted on mesh sheets:
- Glass, ceramic, porcelain, or stone materials
- Perfect for curved surfaces and intricate designs
- Ideal for feature walls, borders, and shower niches
- More grout lines mean more maintenance
Tile Sizes and Formats
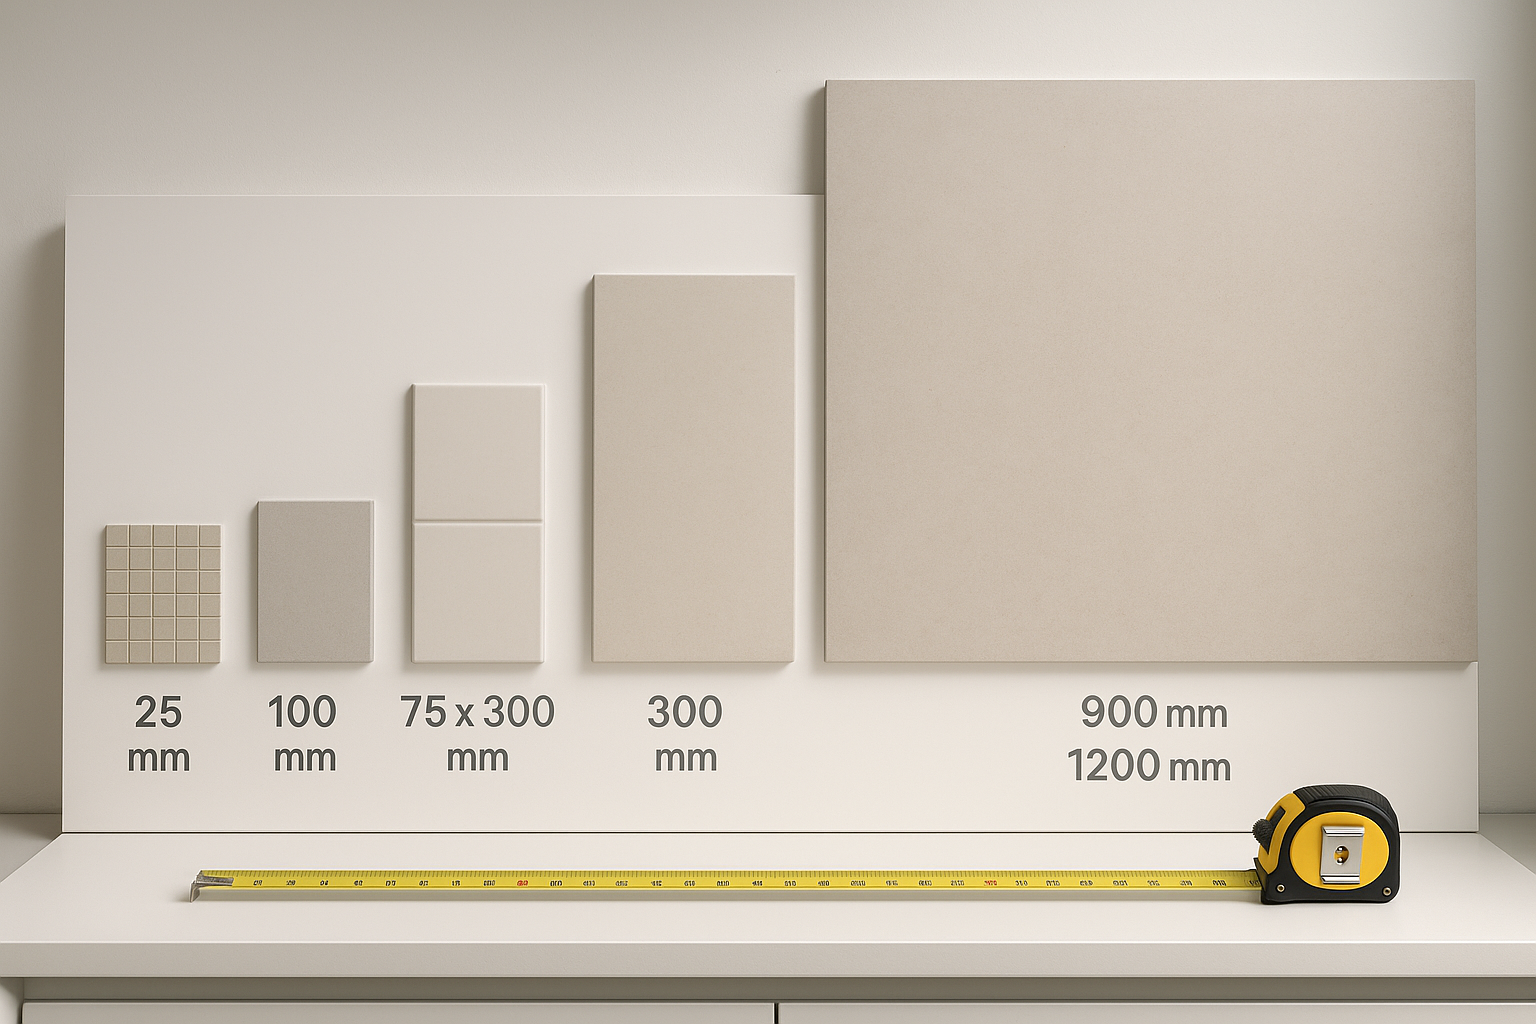
Tile size significantly impacts the visual effect and installation complexity:
Small Format (100-200mm)
- Traditional, classic appearance
- More forgiving of uneven surfaces
- More labor-intensive to install
- Many grout lines to maintain
- Best for: Victorian bathrooms, feature areas, mosaics
Medium Format (200-400mm)
- Most versatile and popular size
- Good balance of aesthetics and practicality
- Subway tiles (75x300mm) remain timeless
- Best for: Most applications, walls and floors
Large Format (600mm+)
- Modern, contemporary appearance
- Fewer grout lines (easier maintenance)
- Makes small spaces feel larger
- Requires perfectly flat surface
- Heavier and more challenging to handle
- Best for: Modern bathrooms, open-plan spaces, minimalist designs
Surface Preparation: The Foundation of Success
Critical: Never Skip Preparation
Proper surface preparation accounts for 80% of a successful tiling job. Tiles laid on poorly prepared surfaces will crack, come loose, or show lippage (uneven edges). Take the time to prepare properly.
Surface Requirements
The substrate must be:
- Flat: Maximum 3mm variation per meter
- Stable: Solidly fixed with no movement or flex
- Dry: Maximum 75% relative humidity
- Clean: Free from dust, grease, paint, or debris
- Suitable: Appropriate for the adhesive and tile weight
Common Substrates and Preparation
Plaster Walls
- Must be fully dry (4-6 weeks for new plaster)
- Prime with diluted PVA or dedicated tile primer
- Fill any cracks or holes with filler
- Sand smooth and dust thoroughly
Plasterboard
- Use moisture-resistant board in wet areas
- Ensure proper fixing at 300mm centers
- Prime with diluted PVA
- Consider tanking in shower areas
Existing Tiles
- Check adhesion - remove any loose tiles
- Clean thoroughly with sugar soap
- Sand to create a key for adhesive
- Prime with appropriate bonding agent
- Ensure surface won't be too high for doors/fixtures
Concrete Floors
- Check moisture levels with hygrometer
- Level with self-leveling compound if needed
- Prime to control porosity
- Apply waterproof membrane in wet areas
Wooden Floors
- Overlay with 6mm+ backer board
- Screw down at 300mm centers
- Tape and fill joints
- Prime before tiling
Adhesive Selection
Using the correct adhesive is essential for long-lasting results:
Standard Cement-Based Adhesive
- For walls and floors in dry areas
- Tiles up to 600mm on walls, any size on floors
- Open time: 20-30 minutes
Flexible Adhesive (S1 or S2 rated)
- For wooden substrates, underfloor heating, large format tiles
- Accommodates slight movement
- Essential for plywood/backer board installations
Rapid-Setting Adhesive
- Grout-ready in 3-6 hours
- Perfect for urgent projects or commercial work
- Shorter working time requires more skill
Ready-Mixed Adhesive
- Convenient for small jobs and walls only
- No mixing required
- Not suitable for floors or wet areas
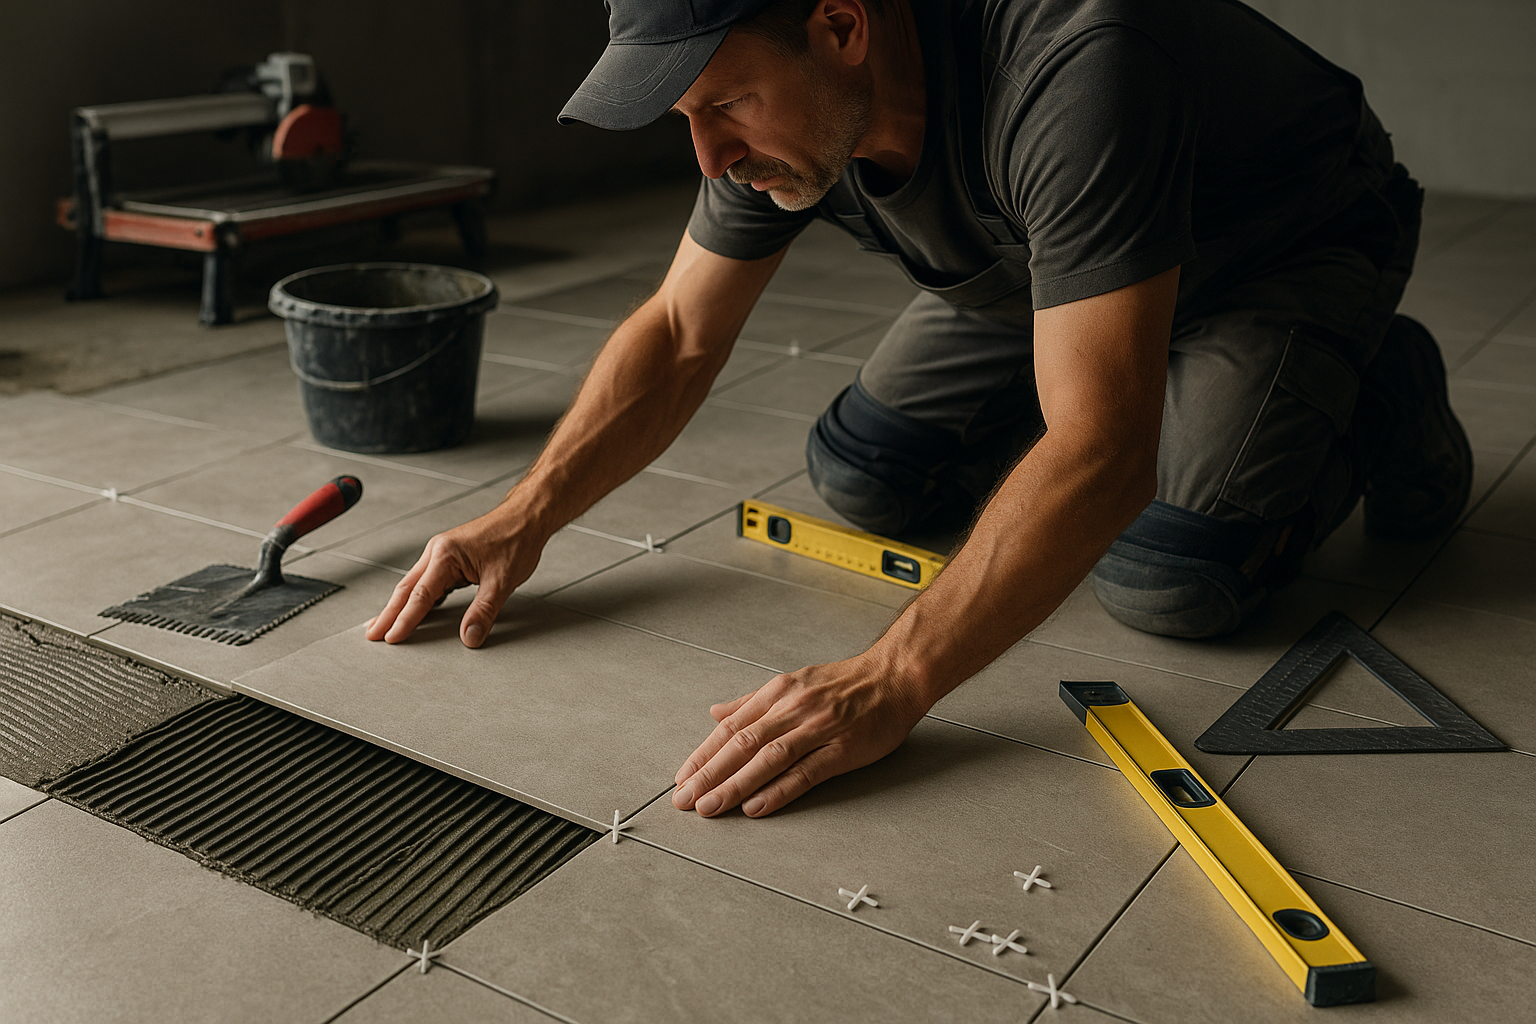
The Tiling Process Step-by-Step
Step 1: Plan Your Layout
Proper planning prevents poor placement:
- Find center points: Mark the center of walls and floors
- Dry lay: Position tiles without adhesive to check layout
- Avoid slivers: Adjust starting point so edge cuts are at least half a tile
- Plan patterns: Decide on brick bond, herringbone, or straight lay
- Feature tiles: Position special tiles symmetrically
- Consider grout lines: Typically 2-5mm depending on tile size
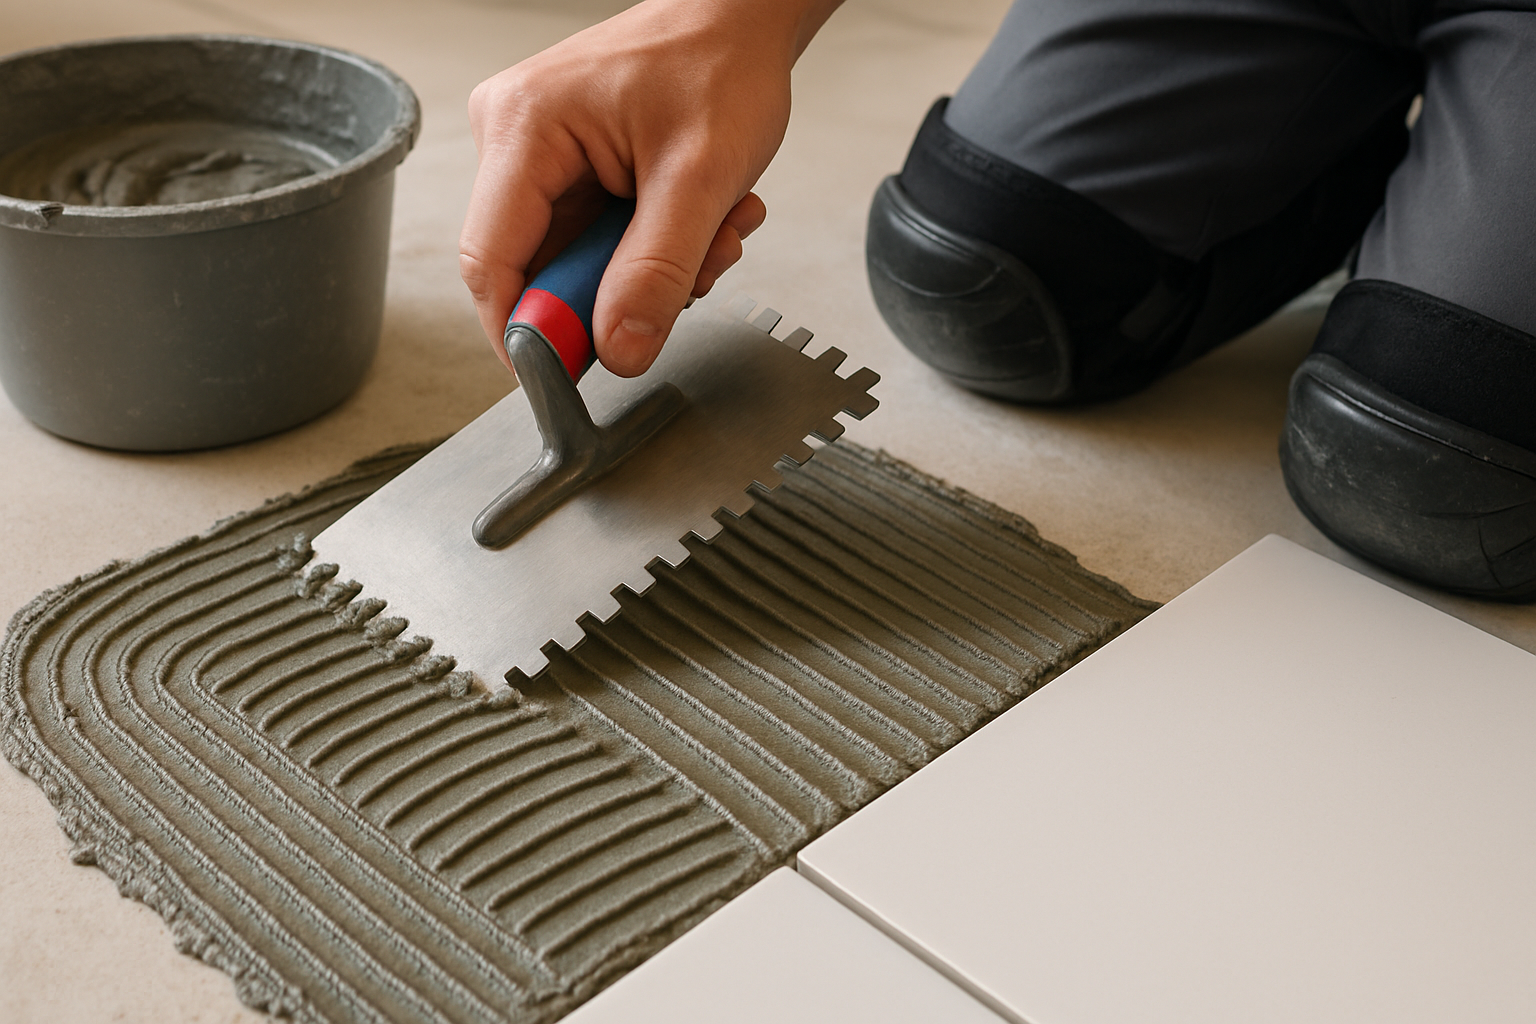
Step 2: Apply Adhesive
Correct adhesive application ensures full support:
- Mix adhesive to smooth, lump-free consistency
- Apply with flat side of trowel first (flatten)
- Comb through with notched side at 45° angle
- Cover approximately 1 square meter at a time
- Ensure 100% coverage - back-butter large format tiles
- Work within open time (20-30 minutes typically)
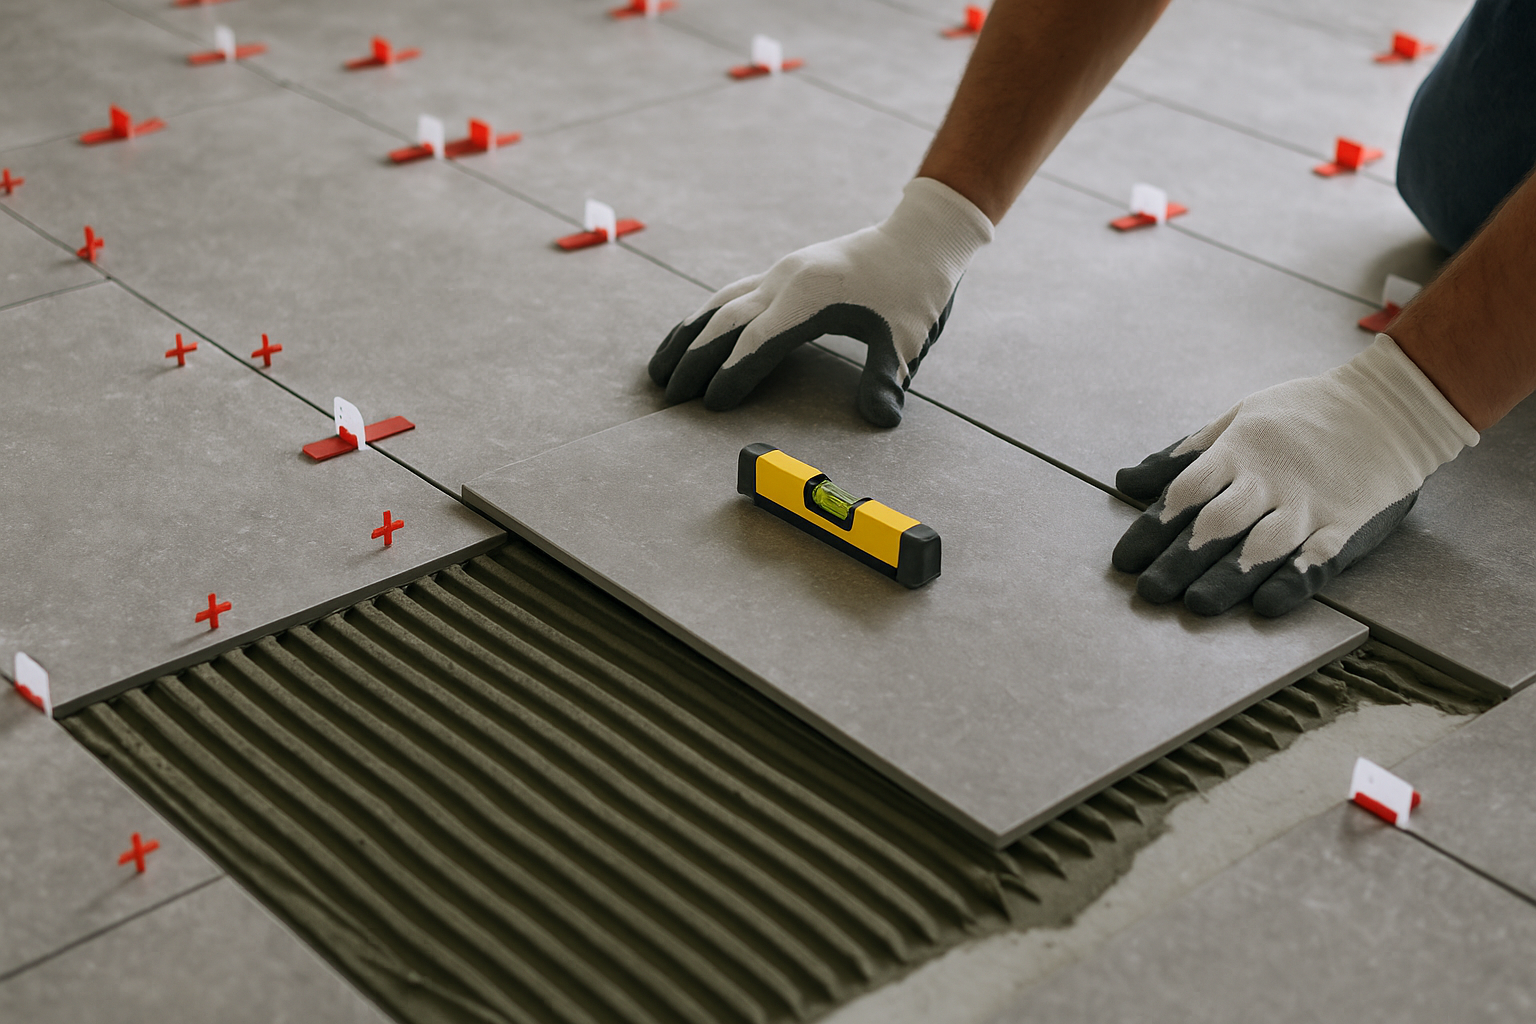
Step 3: Set the Tiles
Precision during placement is critical:
- Press tile firmly with slight twisting motion
- Use spacers for consistent grout lines
- Check level frequently with spirit level
- Use tile leveling system for large format tiles
- Clean excess adhesive from tile face immediately
- Don't walk on floor tiles for 24 hours
Step 4: Cutting Tiles
Clean cuts require the right tools:
Manual Tile Cutter
- Best for: Straight cuts on ceramic and thin porcelain
- Advantages: Quiet, dust-free, portable
- Limitations: Struggles with thick porcelain or small cuts
Electric Wet Saw
- Best for: All tile types, intricate cuts, notches
- Advantages: Clean cuts on any material, precise
- Considerations: Messy, requires water source
Angle Grinder with Diamond Blade
- Best for: Irregular shapes, curved cuts, thick tiles
- Advantages: Very versatile
- Considerations: Dusty, requires steady hand
Step 5: Grouting
Wait at least 24 hours after tiling (72 hours for natural stone):
- Remove spacers and clean out grout joints
- For natural stone, seal tiles before grouting
- Mix grout to toothpaste consistency
- Apply diagonally across tiles with rubber float
- Pack grout firmly into joints
- Remove excess before it dries (10-20 minutes)
- Polish with damp sponge, changing water frequently
- Final polish with dry cloth after 30 minutes
- Avoid water contact for 24 hours
Step 6: Sealing
Protect grout and porous tiles:
- Wait 48-72 hours for grout to fully cure
- Seal all natural stone tiles
- Seal grout in wet areas to prevent staining
- Apply with brush or applicator
- Wipe excess from tile surface
- Reapply annually in showers and kitchens
Popular Tiling Patterns
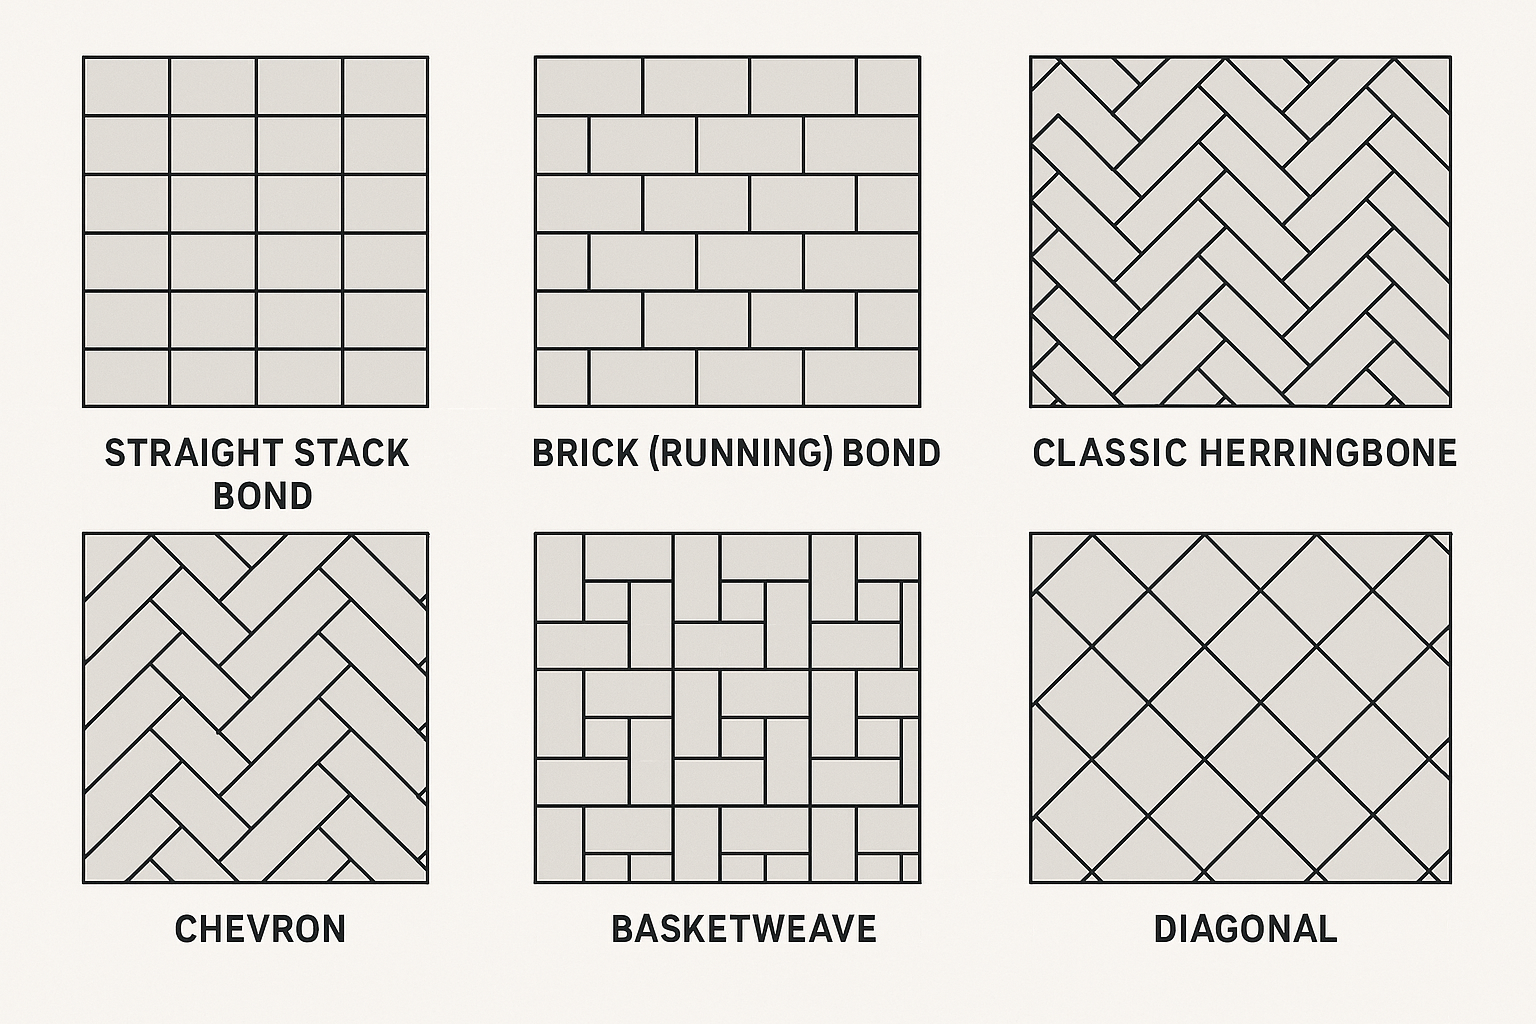
Straight/Stack Bond
Tiles aligned in rows and columns. Modern and minimalist, emphasizes clean lines. Best with large format or rectified tiles.
Brick/Running Bond
Each row offset by half a tile. Classic and forgiving, hides imperfections. Perfect for subway tiles. Most popular pattern.
Herringbone
Rectangular tiles placed at 45° angles in V-shape pattern. Creates dynamic, sophisticated look. More complex installation requires precision cutting.
Chevron
Similar to herringbone but tiles cut at angles to create continuous zigzag. More expensive due to waste and cutting. Bold, contemporary statement.
Basketweave
Pairs of tiles alternate direction creating woven appearance. Traditional, cottage-style charm. Works well with square tiles.
Diagonal
Standard grid rotated 45°. Makes small spaces appear larger. More waste due to edge cuts. Best on floors.
Room-Specific Considerations
Bathroom Tiling
- Floors: Non-slip porcelain or textured tiles (R10-R11 rating)
- Shower walls: Fully waterproofed with tanking system
- Grout: Epoxy grout for shower areas (mold resistant)
- Layouts: Plan to avoid tiny cuts around fixtures
- Heating: Compatible with underfloor heating systems
Kitchen Tiling
- Backsplashes: Easy-clean glazed tiles, avoid porous materials
- Behind hobs: Heat-resistant materials, sealed grout
- Floors: Durable porcelain, matt or textured finish
- Color: Light colors hide water spots better
- Outlets: Plan cuts around sockets carefully
Floor Tiling
- Durability: PEI 4-5 rating for high-traffic areas
- Slip resistance: R10 minimum, R11-R12 for wet areas
- Transitions: Use appropriate profiles between rooms
- Expansion joints: Every 4-5 meters and at doorways
- Thresholds: Match or complement adjacent flooring
Maintenance and Care
Daily Care
- Wipe spills immediately to prevent staining
- Sweep or vacuum regularly to remove grit
- Damp mop with pH-neutral cleaner
- Avoid abrasive cleaners that damage grout
- Use exhaust fans to reduce moisture buildup
Periodic Maintenance
- Deep clean grout lines with brush and specialist cleaner
- Reseal grout annually in wet areas
- Reseal natural stone every 1-2 years
- Check for loose tiles and re-fix promptly
- Repair cracked grout to prevent water ingress
Stain Removal
- Hard water marks: Vinegar solution (not on natural stone)
- Mold/mildew: Bleach solution or specialist mold remover
- Grease: Degreasing detergent or baking soda paste
- Rust stains: Oxalic acid-based cleaner
- Grout discoloration: Grout pen or re-grouting
Common Tiling Mistakes to Avoid
Pro Tip: The 80/20 Rule of Tiling
Spend 80% of your time on preparation and planning, and only 20% on actual tiling. This ratio ensures professional results. Rushing preparation is the number one cause of tiling failures.
1. Poor Surface Preparation
Uneven substrates cause lippage (uneven tile edges) and hollow spots that lead to cracking. Always level and prime properly.
2. Using Wrong Adhesive
Standard adhesive on wooden floors leads to cracking. Large format tiles need appropriate adhesive with full coverage. Always match adhesive to application.
3. Ignoring Expansion Joints
Tiling from wall to wall without expansion joints causes tiles to crack as building moves. Include movement joints every 4-5 meters.
4. Inadequate Waterproofing
Tiles are not waterproof - water penetrates grout lines. Always tank wet areas with proper membrane systems before tiling.
5. Poor Layout Planning
Starting from edges without planning leads to tiny, difficult cuts in visible areas. Always dry lay and start from center or most visible point.
6. Insufficient Adhesive Coverage
Large format tiles need 100% adhesive coverage (back-buttering required). Hollow spots cause cracking under pressure.
7. Grouting Too Soon
Grouting before adhesive cures causes tiles to shift and creates weak bonds. Wait minimum 24 hours, 72 hours for natural stone.
When to Hire a Professional
While some tiling projects are DIY-friendly, professional expertise is recommended for:
- Large format tiles: 600mm+ tiles require specialized techniques
- Natural stone: Requires specific adhesives, sealing, and handling
- Wet rooms: Critical waterproofing must be perfect
- Complex patterns: Herringbone, chevron require precision
- Uneven surfaces: Extensive leveling needed
- Large areas: Living rooms, open-plan spaces
- Structural concerns: Weight loading, floor strength issues
Ready for Professional Tiling?
Our experienced tilers deliver flawless installations for bathrooms, kitchens, and floors. We handle everything from surface preparation through to final sealing, ensuring your tiles look perfect and last for decades.
Contact us for a free consultation and quote. We'll help you choose the right tiles, plan the perfect layout, and deliver professional results you'll love.
Key Takeaways
- Choose porcelain for durability and versatility in most applications
- Surface preparation is 80% of success - never skip this step
- Match adhesive type to substrate and tile size
- Plan layout carefully to avoid small cuts in visible areas
- Use tile leveling systems for large format installations
- Waterproof properly with tanking systems in wet areas
- Wait adequate cure times before grouting and sealing
- Seal grout in wet areas and all natural stone tiles